Pages

Thursday, September 29, 2022

Sending You Hugs

  I am a hugger. I love to give hugs and receive them but there are times when I can't physically be there to give a hug so I love to send a hug in a card just as much! "Hannah's Heart" from High Hopes is the perfect stamp for a hug in a card. How cute is she hugging her heart - love the patch on it!


I stamped Hannah onto alcohol marker friendly paper, coloured her with Copic markers and cut her out with a pleated lace square die from Gina Marie Designs. I combined patterned paper from two different companies to create my card design and added some smaller heart pieces to the sides. I masked the sentiment out of a larger sentiment and put it sideways for something different. Enamel dots finish off my card. 

Card Details
Stamps - Hannah's Heart (Q025) - High Hopes Rubber Stamps
Sentiment - Hugs & Hugs (H173) - High Hopes Rubber Stamps
Patterned Paper - Midnight - Cocoa Vanilla, Hearts & Stripes - MFT

Memento Tuxedo Black ink, Hammermill Digital Cover Card Stock, pleated lace square die - Gina Marie Designs, enamel dots

Copic Markers
Skin - E00 E21 E11 E04
Outfit - B91 B93 B95 B97 B99
Hair - E23 E25 D27 E29 E49
Basket - E23 E27 E29 E34 E35 E29
Butterfly - E23 E27 E29 Y00 Y11 Y15 Y19
Hearts - R81 R83 R85 R56
Shading- C0 C1 C4 


Thanks for stopping by! Have a super fantastic day!

Wednesday, September 28, 2022

Couples Cruise!

It’s Wednesday, and this week, I made a card using High Hopes Rubber Stamps Couples Cruise - S135 for the image and Wonderful Adventure - H164 for the sentiment. Cruising is starting up again and I can't wait to go! Seeing this image reminded me of all of the fun times we've had and of all of the fun times to come.

To make my card this week, I began with a card base of AC Cardstock - White, cut and scored to be 6" x 6". Forever In Time - Textura Sky was cut to the size of 5-7/8" x 5-7/8" and was adhered to the base using double-sided tape. Craft Consortium - Clare Therese Ocean Tale was cut to the size of 5.75" x 5.75" and was popped up onto the base using U-Line double-sided tape. Using Forever In Time - Textura Sky cardstock and My Creative Time - Rectangle Frame Layers, the larger frame was die cut using the Cuttlebug. Copic Marker X-Press It Blending Card and My Creative Time - Rectangle Frame Dies were used to die cut Copic Marker X-Press It Blending Card cardstock using the Cuttlebug as well. Lastly, the little clouds were die cut using Lawn Fawn Cuts - Centre Picture Window Card dies, a scrap of Copic Marker X-Press It Blending Card and my Cuttlebug.

I stamped the image onto the Copic Marker X-Press It Blending Card using Memento - Tuxedo Black ink and my MISTI. Once the image and little clouds were coloured, I added in the little eyes using a Sakura Glaze - Black pen to make them stand out more. The nails in the ark were coloured in with a Pental Sunburst Metalic Med Gel Pen - Silver. A few white caps were created using a General's Charcoal White 558 Pencil in the water.

The sentiment was also stamped using my MISTI onto Copic Marker X-Press It Blending Card cardstock and then fussy cut into 3 separate pieces. I ran this through my Xyron Create a Sticker and adhered it to Recollections - Black cardstock. Once again, I cut around the sentiment, leaving a slim border. U-Line double-sided tape was applied to the back of each of the sentiment pieces, image and blue rectangle and they were all popped up onto the card. For embellishments, I added in three YNS Gumdrops - Firefly Magic Sparkly Gumdrops and some blue and white twine using American Crafts Premium Ribbon.

Card Recipe:

Stamps: Couples Cruise - S135 (High Hopes Rubber Stamps)

Sentiment: Wonderful Adventure - H164 (High Hopes Rubber Stamps)

Inks: Memento - Tuxedo Black

Die Cuts: Lawn Fawn Cuts - Centre Picture Window Card, My Creative Time - Rectangle Frame Layers, My Creative Time - Rectangle Frame Dies

Paper: Copic Marker X-Press It Blending Card, AC Cardstock - White, Craft Consortium - Clare Therese Ocean Tale (6" x 6"), Forever In Time - Textura Sky (6" x 6")

Embellishments: YNS Gumdrops - Firefly Magic Sparkly Gumdrops, American Crafts Premium Ribbon

Tools: MISTI - Most Incredible Stamping Tool, U-Line double-sided tape, Cuttlebug, Xyron Create a Sticker, Sakura Glaze - Black, Pental Sunburst Metalic Med Gel Pen - Silver

Image coloured with Copic Markers:

Ark: E49, E30, E27, E25, E23, Pental Sunburst Metalic Med Gel Pen - Silver

Giraffes: YR31, YR000, E97, E95, E79, E77, E55, E15, R02, R00, W5, Y38

Elephants: C5, C3, C2, C1, R02, R00

Monkeys: E59, E37, E35, E33, E31, E30, G05, G00, YG23

Sky: B02, B01, B00, B000

Water: BG34, BG32, BG11, BG02, BG01, B52, B24, B12, B05, General's Charcoal White 558 Pencil

Clouds:  C1, C00, Colorless Blender

Hope you like it and have a fantastic week!

Check out more adorable images at High Hopes Rubber Stamps!

You can find lots of inspiration from the Design Team Divas at the High Hopes blog, and the High Hopes Rubber Stamps Facebook Fan page plus you can also follow us on
Instagram, Twitter and Pinterest.


Tuesday, September 27, 2022

Fairy Merry Christmas!

Welcome!
Before we know it Christmas will be here! I send out quite a few handmade cards so it's never too early to start designing them. Today I just couldn't resist playing with "Holly The Winter Fairy" from High Hopes Stamps. She's just such a little darling! I love the matching HH Sentiment called "Fairy Merry Christmas"
I stamped my image onto some Copic friendly paper and used my Copic Sketch markers to colour her in. Next using my Brother Cut N Scan, I cut Holly out as well as a slightly larger matching shape from red cardstock. I love these papers from the Polkadoodles "Wintertime, Gnome Season and Ho Ho Gnome" 6x6 collections. I couldn't decide so I used a bit of them all LOL. The die behind Winter Fairy is from Gina Marie and is called "Frilly Lace Nested dies". To finish off my card, I used a MFT Bountiful Bow die and added some enamel dots. And of course some sparkle on her fur trims.
Copics Used:
Skin: E00, E11, E21, R20
Hair: E43, E44, E47
Outfit and holly: R37, R46, R59/ YG17, YG25, YG67/ C5, C7
Wings: C00, C1, C3
White fur on boots & dress: Crystal Stickles
Bells & buckle: Y26, Y27

Thanks so much for stopping by!

Don't forget to head on over to the High Hopes website and see all Lora's adorable stamps! You can find more inspiration from the Design Team by visiting the High Hopes Blog and Facebook page too!
Happy Stamping!

Monday, September 26, 2022

Snoozin' Sam

Howdy - MichelleO here today and this week for High Hopes Stamps I did a little coloring with Snoozin' Sam - its about how I felt myself! 

 
Such a fun image to color... I just love coloring kitties and stacked books! Weird? Probably but I do love it. I decided to go with pajamas on Sam. Coloring with my Copics (colors below) and then doing a little doodling around the image. I found some papers from Paper Studio and the zig zag sort of reminded me of snoozing. LOL The sentiment  It's Raining is just to fun with the image. All though now that childhood chant is ringing in my head. I like the calmer colors with Sam - I usually go a bit heavier on coloring these great image with so much in them, but went softer, maybe cuz he was sleeping?

I added three brads to the corner of the image and then decided to stop as that paper was already pretty busy. 

Copic colors used -
 

For so so so many more images to color up and have fun with click HERE and get transported straight to the High Hopes Stamps Web store. Its so fun to click and see all the joy! 


Thursday, September 22, 2022

First Day Of Fall

  Happy first day of fall! Fall means cooler temperatures, pumpkin patches and corn mazes to run through and October and Thanksgiving are just around the corner. To help ring in a new season I have chosen to use "Country Harvest" from High Hopes Rubber Stamps a gorgeous fall stamp and I think perfect for a Thanksgiving card too!


After stamping and colouring the stamp with copic markers, I used a stitched edge die to cut an the bottom of the stamp. The stitches don't show but I wanted a clean curve edge for my design. I wanted to keep the patterned paper for the background and card design simple to keep the focus on the stamp so I chose a simple wood grain paper and put it on a 6x6 card base. After cutting the curve edge I mounted it on matching card stock and cut the edge again. To add a bit of colour I added some pieces of gingham patterned paper. A sentiment, twine and enamel dots finish off the card.

Card Details

Stamps - Country Harvest (T109) - High Hopes Rubber Stamps
Sentiment - Happy Thanksgiving (F203) - High Hopes Rubber Stamps
Patterned Paper - Knock On Wood - Lawn Fawn, Gingham - Simple Stories

Memento Tuxedo Black ink, Hammermill Digital Cover Card Stock, stitched die - Whimsy Stamps, twine, enamel dots

Copic Markers
 
Pumpkins - YR15 YR16 YR18 E19
Apples - R05 R27 R37 R59 YG01 YG03 YG17 BG99
Straw Bale - Y11 Y15 YR23 Y26
Basket - E23 E27 E29 E34 E35 E29
Sign, Base - E41 E42 E29
Stems, Leaves - YG17 YG67 BG99 B37
Cat - C0 C1 C4 C5 R20 R22
Crow - Y11 Y15 Y25 Y38 T1 T4 T6 T8
Cloth - E50 E53 E42 YG01 YG03 YG17


Thanks for stopping by! Have a super fantastic day!


Tuesday, September 20, 2022

The Best Dirt!

It’s Wednesday, and this week, I made a card using High Hopes Rubber Stamps Gordon Groundhog - R123 for the image and The Best Dirt - F221 for the sentiment. My husband loves gardening and this makes me think of him! LOL! We have a few little squirrels that like to raid his garden, eat the tomatoes and dig up the potatoes. Luckily, my husband is good natured and says he can't get mad at them for what comes natural. We call our back yard the Stevenson's oasis for wild animals. We have bunnies, squirrels, racoons, possums and a mole that seem to like our vegetables and sometimes we've even caught them sleeping up on the furniture under the Gazebo. My husband has now installed a backyard web cam so that we can now capture some of what goes on at night while we are sleeping.

To make my card this week, I began with a card base of Hammermill - Premium Colour 100 lb., cut and scored to be 5.5" x 4.25". Echo Park - New Day Beautiful Blooms Paper was cut to be the same size as the base and applied using double-sided tape. Tim Holtz Distress Ink - Mowed Lawn and a finger dauber were used to ink around all of the edges of the card. Anna Griffin Empress Mini Cutting Machine and My Favourite Things Die-Namics - Single Stitch Line Rounded Rectangle Frames were used to die cut Stampin' UP! - Regals Designer Series Paper, Copic Marker X-Press It Blending Card and Hammermill - Premium Colour 100 lb. cardstock.

The clouds in the sky were created using the inner part of the die-cut from the Hammermill - Premium Colour 100 lb. cardstock and a mid-size Gina K Designs Blender Brush, Tim Holtz Distress Ink - Salty Ocean and stencils that I created using Avery Elle - Pierced Clouds Die. Once this was done, I used regular tape to piece the outer die cut from the Stampin' UP! - Regals Designer Series Paper and the clouds piece together from the back side. I stamped the image onto the inner frame of the Copic Marker X-Press It Blending Card using Memento - Tuxedo Black ink and my MISTI. Once the image was coloured, it was fussy cut around the top part of the image. I applied U-Line double-sided tape to the image and background pieces that I had joined together and popped them both up onto the card.

The sentiment was also stamped using my MISTI onto the same cardstock and then cut with a small cutting device. I ran this through my Xyron Create a Sticker and adhered it to Recollections - Black cardstock. Once again, I cut around the sentiment, leaving a slim border. U-Line double-sided tape was applied to the back of this and it was popped up onto the card. Lastly, to finish it off, I added some Doodlebug Design Inc. Braddies with Glue Dots - Mini.

Card Recipe:

Stamps: Gordon Groundhog - R123 (High Hopes Rubber Stamps)

Sentiment: The Best Dirt - F221 (High Hopes Rubber Stamps)

Inks: Memento - Tuxedo Black, Tim Holtz Distress Ink - Mowed Lawn, Tim Holtz Distress Ink - Salty Ocean

Die Cuts: My Favourite Things Die-Namics - Single Stitch Line Rounded Rectangle Frames, Avery Elle - Pierced Clouds Die (D-05-01)

Paper: Copic Marker X-Press It Blending Card, Hammermill - Premium Colour 100 lb., Stampin' UP! - Regals Designer Series Paper Stack (12" x 12"), Echo Park - New Day Beautiful Blooms (12" x 12"), Recollections - Black

Embellishments: Doodlebug Design Inc. Braddies - Bubble Blue Blossoms and Tangerine Blossoms

Tools: MISTI - Most Incredible Stamping Tool, U-Line double-sided tape, Anna Griffin Empress Mini Machine, Glue Dots - Mini, Xyron Create a Sticker, Sakura Glaze - Black

Image coloured with Copic Markers:

Groundhog: E29, E27, E25, E23, (Nose and Eyes - Sakura Glaze - Black)

Jeans: B26, B23, B21, E31

Hard Hat: Y17, Y15, Y08

Dirt, Stones, Stem and Grasses: E37, E35, E33, E31, W7, W5, W3, YG23, YG17, YG11, YG09

Flower: E15, Y38, Y35, Y32, Y17, Y08

Hope you like it and have a fantastic week!

Check out more adorable images at High Hopes Rubber Stamps!

You can find lots of inspiration from the Design Team Divas at the High Hopes blog, and the High Hopes Rubber Stamps Facebook Fan page plus you can also follow us on
Instagram, Twitter and Pinterest.


Welcome Little One!

Hello!!
It seems like there a lot of babies being born lately...... must be Covid (lol). Everyone has had a lot of spare time on their hands lol! I'm re-building my stash of baby cards, seems I can't have enough. This cute little dragon is from High Hopes Stamps and is called "Baby Dragon". He goes nicely with the HH sentiment "Sm. Welcome Little One".
To start my card I stamped my image onto Copic friendly paper using Memento Tuxedo Black ink. Then I set about colouring him with my Copic Sketch markers to match the papers from Doodlebug's "Special Delivery" 6x6 collection. I cut out my image with a MFT Stitched Oval die and popped him up over the square and banner die cuts with foam tape. I love using foam tape as it just adds more interest to your card with the dimension it gives. I cut the sentiment in half so that I could have words on the left and bottom corners. A few enamel dots finish off my card.
Copics used:
B21, B23, B24
Y32, Y35
YG17, YG23, YG25
W1, W3

I really appreciate you stopping by today!

Don't forget to head on over to the High Hopes website and see all Lora's adorable stamps! You can find more inspiration from the Design Team by visiting the High Hopes Blog and Facebook page too!
Happy Stamping!


Monday, September 19, 2022

Andrea's Kitties

Howdy - Michelle here today with another Adorable High Hopes Stamps Image! I can't believe that I hadn't colored this one yet! I guess when you have so many fabulous images a few slip through - This is Andrea's Kitties.. giggle.... yep a basket of kitties! 


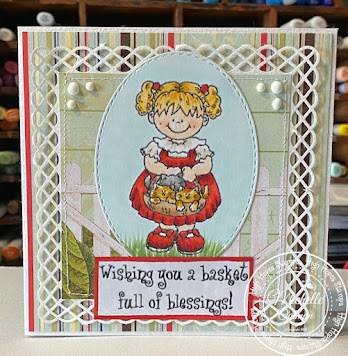
Precious! I colored with my Copics (colors below) and then used a die to cut her out. Love the stitching on the die. I found some older Webster's Pages, that I just adored the fence in the pattern. Seemed to work well with Andrea's Kitties! I layered the patterns with a Martha Stewart Border punch mat. Everything is sewn down, and then matched up with the High Hopes Stamps Sentiment - Fancy Basket Saying - Adore how it works with those little kitties! Now I couldn't find any red card stock to mat the sentiment. So I just did a faux mat with a copic marker around the edge. I do that a lot, it is so easy and works! For just an added bit of embellishment I added some Nuvo White Paint dots in the corners. 

Copic markers used -

A fun card to make - and loved coloring up Andrea's Kitties! To see all the joy at High Hopes Stamps click HERE and pop over and fall in love over and over! 


Thursday, September 15, 2022

Feed Your Soul

 Most people have one or more things that feed their soul. These are things that help them take a deep breath and a step back and ground us. For me, it is colouring stamps, horses and water. I could sit and listen to waves crash on the shore for days. For a lot of my friends and family, it is sewing. I have so many talented quilters and people who sew in my life that never cease to amaze me. 

Quilting and sewing isn't my forte - believe me I've tried - but for my friends and family whose soul it feeds "Let's Sew" from High Hopes Rubber Stamps is perfect for a card for one of them. 


 I stamped on to alcohol marker friendly paper and hand fussy cut this adorable gnome leaving a thin white edge. I set him aside and cut out two quilt die pieces using two different paper pads from Craft Consortium and card stock. After putting down a patterned piece of paper down on the card base I set about putting my quilt squares together. This is a time consuming task but I love that I can put them together in different variations and colours. I may not quilt like my friends and family, but I can say I paper quilt <smile>. 
Next, I cut the completed quilt squares in half and centered them around my card base. I cut out a stitched circle using an inside out die, ran some antique linen distress ink around the edge and glued it down to the middle of card after putting ribbon across the middle. I added my stamp with foam to add a bit of dimension to the card. A sentiment in the corner cut out with a stitched fish tail banner, a bow and some heart dots in the corners finish off my card.

Card Details

Stamps - Let's Sew (TLF031) - High Hopes Rubber Stamps
Sentiment - Needle & Thread (FLL024) - High Hopes Rubber Stamps
Patterned Paper Bright Blooms, Bloom & Wild - Craft Consortium

Memento Tuxedo Black ink, Hammermill Digital Cover Card Stock, quilt die - Purple Daisy Designs, heart dots - Hero Arts, ribbon, stitched fish tail banner die, inside out circle die - Gina Marie designs, antique linen distress ink

Copic Markers
 
Skin - E00 E21 E11 E04
Sewing Machine - C0 C1 C2 C3 C5
quilt - R00 F30 R22 Y00 Y11 Y15
Clothing, hat - G21 G24 G28
Beard - W00 W1 W3 
Chair - E43 E55 E47


Thanks for stopping by! Have a super fantastic day!


Tuesday, September 13, 2022

You're O-Fish-Ally Awesome!

It’s Wednesday, and this week, I made a card using High Hopes Rubber Stamps Finnigan - P117 for the image and O-fish-ally - FLL019 for the sentiment. We have a lot of family and friends that love to fish and when I saw this image and sentiment, I could resist pairing them together.

To make my card this week, I began with a card base of Hammermill - Premium Colour 100 lb., cut and scored to be 5.5" x 4.25". Stampin' UP! - Whale of a Time Designer Series Paper was cut to be the same size as the base and applied using double-sided tape. Using paper from the same pack, I fussy cut around the school of fish and applied it to the base card using a mixture of double-sided tape and glue. The excess was then trimmed off on the bottom and left side of the card. Tim Holtz Distress Ink - Evergreen Bough was applied around all of the outer edges of the card using a finger dauber. Using my Anna Griffin Empress Mini Machine and PinkFresh Studio Essentials - Blanket Stitched Circle, I die cut Copic Marker X-Press It Blending Card cardstock. Then, using my MISTI and Memento - Tuxedo Black ink, I stamped the image onto the die-cut piece. The sentiment was also stamped using my MISTI onto the same cardstock and then die cut using Gina K Designs - Sentiment Strips. Lastly, I combined the dies from PinkFresh Studio Essentials - Blanket Stitched Circle and Lifestyle Crafts Cutting Dies - Nesting Circles to create a frame using the paper from Stampin' UP! - Whale of a Time Designer Series Paper and Anna Griffin Empress Mini Machine.

The image was coloured in with Copic markers listed below. I coloured in the fish first, then the water. Some sand was added to the bottom of the bowl using a Ranger - Emboss It Pen Clear and Seth Apter - Dirty Sand Embossing Powder. This was heat set with a Marvy Uchida - Embossing Heat Tool. I wanted the back part of the sand to appear lighter, so I just dabbed the pen in spots to add in the Embossing Powder after I had coloured it. Lastly, I applied Ranger Inkssentials - Glossy Accents to the inside of the bowl and puddles of water. This was set aside to dry.

Once the Glossy Accents was dry the card was ready to assemble.  I applied some glue to the circle frame I had created earlier and applied it over top of the coloured image circle. U-Line double-sided tape was applied to the back of the image and sentiment and they were both popped up onto the background designer papers. I thought these adorable buttons from Buttons Galore & More - Fun in the Sun Collection were perfect for this card. The button backings were removed from the backs of the fish buttons and U-Line double-sided tape was applied to them. I popped up the 3 fish on the card to finish it off.

Card Recipe:

Stamps: Finnigan - P117 (High Hopes Rubber Stamps)

Sentiment: O-fish-ally - FLL019 (High Hopes Rubber Stamps)

Inks: Memento - Tuxedo Black, Tim Holtz Distress Ink - Evergreen Bough

Die Cuts: PinkFresh Studio Essentials - Blanket Stitched Circle, Gina K Designs - Sentiment Strips, Lifestyle Crafts Cutting Dies - Nesting Circles

Embossing Powder: Seth Apter - Dirty Sand

Paper: Copic Marker X-Press It Blending Card, Hammermill - Premium Colour 100 lb., Stampin' UP! - Whale of a Time Designer Series Paper (6" x 6")

Embellishments: Buttons Galore & More - Fun in the Sun Collection

Tools: MISTI - Most Incredible Stamping Tool, U-Line double-sided tape, Ranger - Emboss It Pen Clear, Marvy Uchida - Embossing Heat Tool, Ranger Inkssentials - Glossy Accents, Anna Griffin Empress Mini Machine

Image coloured with Copic Markers:

Fish: YR68, YR31, YR18, Y38, R89, R59, R39, R29, R24

Fish Bowl, Water, Sand and Water Droplets: B04, B02, B01, B00, E44, E43, E42, E41, C3, C2, C1, C00, Seth Apter - Dirty Sand

Background: BG72, BG57, BG32, BG11, E37, E35, E33, E31

Hope you like it and have a fantastic week!

Check out more adorable images at High Hopes Rubber Stamps!

You can find lots of inspiration from the Design Team Divas at the High Hopes blog, and the High Hopes Rubber Stamps Facebook Fan page plus you can also follow us on
Instagram, Twitter and Pinterest.


Lots Of Hugs!

Happy Tuesday!
I love this little cutie called "Gonna Getcha" from High Hopes Rubber Stamps! He just warms my heart and makes me smile! I'm re-stocking my "friend" cards and I know just the person I'm going to send this too! I haven't seen them all summer so I'm sending lots of hugs to them! Hopefully this cutie will brighten their day and let them know I am missing them!
Today I am using papers from the Honey Bee "Bee Bliss" 6x6 collection. After stamping my image onto Copic friendly paper, I coloured him in to match the designer papers. Next using a Gina Marie Pleated Circle die, I cut him out. I added a Pretty Pink Posh Border die cut to both sides of a flowered strip of paper for some fun! I decided to use the HH sentiment called "Hugs & Hugs" to send that long distance hug I was talking about. Both the sentiment and the main image are popped up with foam tape for some added dimension. A bit of ribbon and a bow finish off my design.
Copics Used:
Mouse: N0, N1, N2, N3, R20
Overalls: BG72, BG75, BG78
T-shirt: YR24, YR27
Grass: YG17

Thanks so much for stopping by today!

Don't forget to head on over to the High Hopes website and see all Lora's adorable stamps! You can find more inspiration from the Design Team by visiting the High Hopes Blog and Facebook page too!
Happy Stamping!

Monday, September 12, 2022

Luigi

Howdy MichelleO here today and this week I went digging in the High Hopes Stamps Web Site and was looking for images I have never colored... there weren't too many! LOL  I thought what a great goal to have some fun coloring every image! So I found just a few to play with this month. Luigi is one I had seen on other cards and just was really excited to play with! I mean common its a heart shaped PIZZA!  So here is my fun with Luigi -  

 Isn't he adorable? Coloring with Copics and then cutting out with an oval stitched die I think he just pops a bit. I was looking for red and white checked pattern paper in my stash, I know I have it. But after digging a while I found this sweet My Minds Eye papers that have lots of fonts of  "I Love You" and just thought it would be too perfect with that heart shaped pizza. I layered the papers with red card stock and then created a border with a scalloped EK Success border punch. Everything is sewn down and then the High Hope Stamps sentiment "You have a pizza my heart!" is the perfect match with Luigi

For a bit of added sparkle I added a few red glitter enamel dots. Love Luigi... think he will be colored up more and more - 

Copic colors used -


Now you just must click over to the High Hopes Stamps Web site and see all the joy there! You will fall in love with LOTS of fabulous images! Click HERE

Hmmm.... I think I will now find Hubby and see about Italian food for dinner, I'm having a craving! 

Thanks - 


Thursday, September 8, 2022

Dragonfly Birthday

 July and August are big birthday months in my family so my birthday card stash gets used up very quickly. That's just on my side of the family.......then there is hubby's side. I have a few people on both sides who love flowers and I love dragonflies so I combined the two to make an A2 size card featuring "Lg. Realistic Dragonfly and Gladiolas" stamps from High Hopes Rubber Stamps to begin replenishing my stash.


 After stamping the flowers and dragonflies on alcohol marker friendly paper I coloured them with Copic markers and hand fussy cut the dragonflies and one flower. I chose a darker shade of the flower colour for the card stock and added a lattice background die cut. I cut out one flower and card stock with a stitched oval die and after cutting the second flower to size glued it onto the edge of the oval. 

Next I added the dragonflies by popping them up with foam pop dots and added Star Dust Stickles to their wings - they are so sparkly! I stamped and cut the sentiment to size, added it matching card stock and placed it in the bottom corner. Enamel dots finish off my card.


Card Details

Stamps - Lg. Realistic Dragonfly (G017)Gladiolas (TFG038) - High Hopes Rubber Stamps
Sentiment - Happy Birthday Script (TDG028) - High Hopes Rubber Stamps
Patterned Paper - Fall - Echo Park, Grunge Light Tones - Craft Consortium

Memento Tuxedo Black ink, Hammermill Digital Cover Card Stock, lattice background die - Gina Marie Designs, Star Dust Stickles, enamel dots

Copic Markers
 
Gladiolas - R81 R83 R85 R59 G21 G24 G28
Dragonflies - B01 B02 B04


Thanks for stopping by! Have a super fantastic day!


Tuesday, September 6, 2022

Book Worm!!

It’s Wednesday, and this week, I couldn't resist making this very easy bookmark using High Hopes Rubber Stamps Book Worm - P100 for the image. My husband I both love to read and with this adorable image, it is quick to create multiple bookmarks quickly. They would also be a great gift for the readers in your life too!

To make my bookmark this week, I stamped the main image onto Copic Marker X-Press It Blending Card cardstock using my MISTI and Memento - Tuxedo Black ink. I coloured in the image and I wanted the eyes to stand out. I added in a small line with a Pigma Micron #5 - Black pen and then added some colour to the eyes. To finish the eyes,  I added a little dot of white using a Gelly Roll Sakura #8 Pen. The image was then fussy cut with a small white border all around it. Crafts - Designer Paper - 02-3093268 was die cut using Die-Namics MFT-489 PCD Fishtail Figs STX and my Anna Griffin Empress Mini Machine. I punched a hole using We R Memory Keepers Crop-A-Dile Eyelet and Snap Punch at the top of the bookmark. We R Memory Keepers Embellishment Makers Basic Tools-Tassel Loom was used to create the tassel along with 3 yards of twine and then 2 6" pieces of twine.  I wanted the image to lay flat on the bookmark, so I ran it through my Xyron Create a Sticker and then applied it to the die cut. I tied a knot in the twine to join the tassel to the book mark and then added some Ranger Inkssentials - Glossy Accents to the glass lenses to finish it off.

Card Recipe:

Stamp: Book Worm - P100 (High Hopes Rubber Stamps)

Ink: Memento - Tuxedo Black

Paper: Copic Marker X-Press It Blending Card, Hammermill - Premium Colour 100 lb., Crafts - Designer Paper - 02-3093268 (6" x 6")

Die Cuts: Die-Namics MFT-489 PCD Fishtail Figs STX

Tools: MISTI - Most Incredible Stamping Tool, Xyron Create a Sticker, Gelly Roll Sakura #8 Pen, Ranger Inkssentials - Glossy Accents, Pigma Micron #5 - Black, Anna Griffin Empress Mini Machine, We R Memory Keepers Crop-A-Dile Eyelet and Snap Punch, We R Memory Keepers Embellishment Makers Basic Tools-Tassel Loom

Image coloured with Copic Markers:

Worm: YG23, YG11, YG09, R20, R30

Eyes: C1, C0, E25, E23, Y17, W9, Gelly Roll Sakura #8 Pen, Pigma Micron #5 - Black

Glasses and Bow Tie: BV29, BV25, BV23, Ranger Inkssentials - Glossy Accents for the lenses

Book: BV25, BV23, V000

Hope you like it and have a fantastic week!

Check out more adorable images at High Hopes Rubber Stamps!

You can find lots of inspiration from the Design Team Divas at the High Hopes blog, and the High Hopes Rubber Stamps Facebook Fan page plus you can also follow us on
Instagram, Twitter and Pinterest.


School Days!

Happy Tuesday!!!!
Yahoo, whoopee, the kiddo's are back to school today! I bet a lot of Mom's out there are happy to see this day come after a summer of fun (and exhaustion LOL) with the kids. The kids are happy to go back and see their friends! All around everyone is happy LOL! I thought this was the perfect image for my post today, a nice welcome back to your teacher! This is the "School Days Quick Card" rubber stamp from High Hopes Stamps.
I started my card by stamping my image onto Copic friendly paper and colouring it in with my Copic Sketch Markers. Then, using a square die, I cut out my coloured image and backed it with some red cardstock. My papers are from the Doodlebug "School Days" 6x6 collection, I designed my card base. I love the sentiment "To Teach Is To Touch"! I cutie in half to place on the top and bottom of my card.. Teachers are very important in our early years and have an important job teaching and shaping the minds of our youth! A few enamel dots finish off my card design.
Copics Used:
B21, B24, B27, B29
Y35, Y38
G28, YG01, YG03, YG17
C8, E35, E39, B00

Don't forget to head on over to the High Hopes website and see all Lora's adorable stamps! You can find more inspiration from the Design Team by visiting the High Hopes Blog and Facebook page too!
Happy Stamping!

Monday, September 5, 2022

Heidi & Mattie - Best Friends

Howdy- MichelleO here! Today is my High Hopes day! And I just had to color up this cutie... this is Heidi and Mattie. They are adorable right?

I colored with my Copics (colors below) - Then cut the image with an oval - My pattern papers are from Heidi Grace. Love the fun sweet feel of these papers. A Martha Stewart border eyelet punch. All sewn down. The sentiment "Best friends" is perfect for the duo! I punched a EK Success tag punch to use as a border for the sentiment. 

Copic colors used - 

I just love the girlie feel to this one! And I always love the color combo of Purple and Green. Haven't done that in a while. Hope you enjoyed this one. And to see SO MANY wonderful fun image visit the High Hopes Stamps Web Store HERE and fall in love and get some new friends to color for your projects.


Thursday, September 1, 2022

Happy Harvest

  I live in a rural area and one of the reasons fall is my favourite time of year is that around where I live and on my drive to work, I pass many fresh farm produce stands at the end of farm lane ways. I don't always get a chance to stop but when I do, I enjoy fresh corn, peas, squash, flowers - I've seen some huge sunflowers this year, eggs and beans to name a few. "Happy Harvesting" from High Hopes Rubber Stamps reminds me of these stands because I think it looks like he is taking his fresh produce out to put on his stand. It all looks very yummy!


I stamped this adorable gnome on alcohol marker friendly paper, coloured him with Copic markers and hand fussy cut him leaving a thin white edge. I set him aside and gathered the dies and patterned paper from Echo Park and Craft Consortium that I wanted to use on my card. I cut my paper pieces to fit my 5.5" x 5.5" card base and then cut the fence, grass, trees and clouds for my scene. I cut and glued down each piece, added the stamp to the middle section and popped the section up with foam pop dots. To finish my card I stamped the sentiment and added it to matching card stock, added some ribbon and a bow and enamel dots. 

Card Details

Stamps - Happy Harvesting (SLF023), - High Hopes Rubber Stamps
Sentiment - Bold Happy Harvest (G085) - High Hopes Rubber Stamps
Patterned Paper - Fall - Echo Park, Grunge Light Tones - Craft Consortium

Memento Tuxedo Black ink, Hammermill Digital Cover Card Stock, grass die - Dress My Craft, fence die - Gina Marie Designs, cloud die - Your Next Stamp, ribbon - Stampin' Up, pop dots, enamel dots  

Skin - E00 E21 E11 
Carrots - Y38 YR16 YR18
Watermelon - YG01 YG03 YG17 G28
Tomatoes - R24 R27 R37 R59
Egg Plant - V15 V17 V09
Squash- Y21 Y23 Y26
Turnip - V05 V06 E30 E31
Leaves - YG01 YG03 YG17 G28
Boots - E23 E25 E27
Flower -  Y21 Y26
Clothes - B91 B93 B95 B97 B39
Wheelbarrow - E34 E35 E57 E27
Beard - W1 W2 W3 W5


Thanks for stopping by! Have a super fantastic day!