Showing posts with label Merry Christmas. Show all posts

Tuesday, September 17, 2024

Stackable Stanley says Merry Christmas!

 Happy Tuesday HH fans!

Today I'm sharing our adorable image called Lg. Stackable Stanley which I have paired with our Merry Christmas sentiment.  We also have a smaller Stackable Stanley which you can find here.  

This image is just so fun to play around with the possibilities are endless.

I coloured this cutie up while I was away in June at my son's in the Yukon.  I needed to get myself ahead for Christmas cards this year.  

I cut out a few snowflakes with glitter paper & added some silver glittered enamel dots for just a bit of sparkle.  I added a little Twine bow in blue & white....which by the way I pilfered from my friend lol.

The patterned paper is from Ink N' Splatter Stamps.  If you are in the US you can find it HERE, if you are Canadian & would like this 6 x 6 pad I do have a couple in stock.  They are not on our website but I can add them to an order for you.  Retail price here is Canada is $14.95 CDN per pad.  Each pad contains 24 double sided sheets of brightly coloured patterned paper & there are 12 designs per pad.

Prismacolor Premier Pencil Combos

PC105 Cobalt Turquoise
PC905 Aquamarine
PC992 Light Aqua

PC901 Indigo Blue
PC1100 China Blue

PC118 Cadmium Orange
PC1032 Pumpkin Orange

PC1059 10% Cool Grey
PC1060 20% Cool Grey

*I used Gamsol & Blending Stumps*

Sm. Stackable Stanley is available HERE

Thanks for popping by today & happy stampin'!

Thursday, November 2, 2023

Christmas Snooze

  It is beginning to look a lot like Christmas in my craft room. I have a lot of cards to get done. I have quite a few men and young men on my card giving list so this card has more of a masculine feel to it for one of them. This card features Friends Snooze from High Hopes Rubber Stamps.....I am thinking this must be after Christmas dinner - I always feel like I need a snooze afterwards - smile.


After colouring the stamp with Copic markers, I cut it out using a stitched rectangle die. I set it aside, stamped my sentiment and cut it out with a matching stitched die since I had them out. I found some patterned paper from Carta Bella and Photo Play to create my background. 
After gluing down the wood paper, I cut three 1.75 inch x 5 inch strips, mounted them on card stock and added pieces from an icicle border. The finished card size is 5.5 inches x 5.5 inches. I glued them down, added the stamped image after I had put it off set on to card stock and glued the sentiment down in the corner. Enamel dots finish off my card. 


Stamp Recipe
Stamps - Friends Snooze (TDG013)- High Hopes Rubber Stamps
Sentiment - Merry Christmas (FDG008) - High Hopes Rubber Stamps
Patterned Paper - Not A Creature Was Stirring - Photo Play, Farmhouse Christmas - Carta Bella

Memento Tuxedo Black ink, Hammermill Digital Cover Card Stock, stitched rectangle die, icicle border die - Impression Obsession, enamel dots

Copic Markers
Bear - E43 E44 E47 E49 T4 T6 T8 R12 R00
Scarves and Hat - R05 R17 YR18
Bird - Y11 Y17 BG11 BG32 BG13 BG18
Snow - B000 B00
Branches - G85

Thanks for stopping by! Have a super fantastic day!

Friday, December 17, 2021

Merry Christmas

Welcome Everyone;

Christmas will be here in another week and it's hard to believe that another year is almost over.

For today's card, I have used the adorable Christmas Gofer paired with the Merry Christmas sentiment stamps.  Both are from the Woodland Winter Release by High Hopes Stamps.

After stamping the image onto some Copic Markers friendly paper, I used a square die to cut it out.  Some Nuvo Glitter Accents - White Blizard was added to the snow and the trim on the hat.  Some enamel dots finished off this CAS card.


Supplies used:

  • Stamps:  Christmas Gofer - TDG003, Merry Christmas - FDG008 -- Woodland Winter Release, High Hopes Stamps
  • Ink:  Tsukineko Memento Tuxedo Black
  • Paper:  XPress It Blending Cardstock, DP - North Pole Trading Co., - Photoplay, Red Mulberry Paper
  • Copic Markers
    • E33 - Sand, E31 - Brick Beige, E30 - Bisque
    • N8 - Neutral Gray No. 8, N7 - Neutral Gray No. 7, N6 - Neutral Gray No. 6
    • G17 - Forest Green, G16 - MIstletoe, G14 - Apple Green
    • R46 - Strong Red, R29 - Lipstick Red, R27 - Cadmium Red
    • E40 - Brick White, E41 - Pearl White, E42 - Sand White
    • E50 - Egg Shell, E51 - Milky White, E53 - Raw Silk  
  • Dies:  Double Stitched Squares & Stitched Nesting Tags both from Gina Marie Design
  • Nuvo Glitter Accents:  White Blizard
  • Miscellaneous:  Zig Wink of Stella - Clear, Enamel Dots

Come for a visit at High Hopes Stamps and check out the brand new Woodland Winter Release now available at High Hopes Stamps.  If you are in need of some daily inspiration, pop on over to the  High Hopes Stamps Blog, where you can what the HH Divas have created.  You can also follow us on Facebook, Twitter and Instagram.
 

Thanks for stopping by and have a great day,

Hugs,


Tuesday, December 7, 2021

Penguin Tag!

Happy Tuesday!
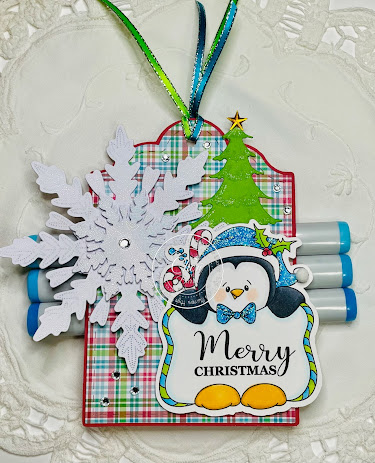
It's another exciting month over at High Hopes Rubber Stamps with the Woodland Winter Release. These are images that were previously retired and are so adorable, they just had to see the light of day again! Meet the adorable "Penguin Tag"! You all know I love penguins as they remind me of my Grandma. She would have loved to receive this tag on her Christmas present. You can use "Penguin Tag" as a tag or as an image on a card, it's perfect for both!
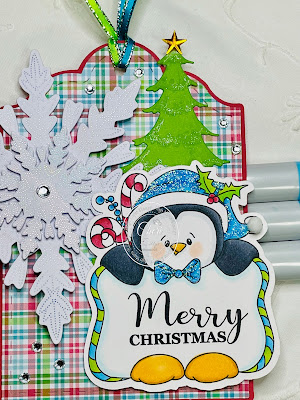
I started my tag by stamping the image onto some Copic friendly paper and using my Copic Sketch markers coloured it in. Next I cut the image out using my Brother Cut N Scan. I stamped the "Merry Christmas" sentiment onto the sign, it fit perfectly! Gina Marie has some really cool dies and I used the Arched Stitched Tag die to cut out my background. The snowflake is from a Christmas card I got last year that I repurposed on my tag. A green tree die cut was put behind my popped up image. I added Crystal Stickles to the Penguin's hat and a glitter pen to the embossed parts of the tree die cut. Using my Crop-a-dile Hole Punch I punched a hole in the top of the tag and added 2 strands of ribbon. Some diamond gem stones add the perfect finishing touch.
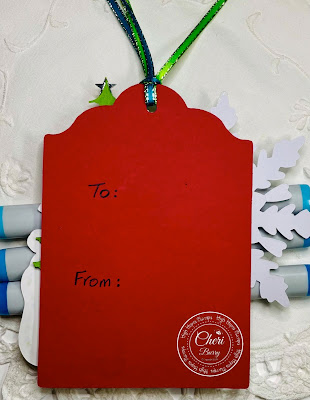
On the backside I hand printed "to" and "from" and I plan to use this on a present this Christmas.
Copics Used:
Penguin: C0, C6, C8, C9/ YR21, YR24
Blue: B02, B04, B05
Green: YG03, YG05, YG06
Red: R46, R85

Thanks for stopping by today and don't forget to check High Hopes out on:

You'll see all the goodies in the Woodland Winter Release on those sites!

Happy Stamping!


Tuesday, November 24, 2020

Canadian Christmas Greeting in Creative Scrapbooker

Happy Tuesday HH fans!

I'm always delighted to share when one of our Diva's is published...it makes my heart so happy!

Creative Scrapbookers new Winter 2020 Issue is now out & we can share Donna Rudy's latest published card using Canadian Christmas Greeting.  Congrat's Donna!!!


Donna paired this adorable stamps with our  Bold Merry Christmas, Eh? sentiment. 
 
If you are ever published using a High Hopes Rubber Stamp please let me know.  I would love to share with everyone.
 
Crafty hugs,


Wednesday, September 30, 2020

Gnome - Merry Christmas!

 It’s Wednesday, and this week I'm featuring a Christmas card I made using the image Flying Gnome - TLF008 and sentiment Sm Christmas Script - F051 from (High Hopes Rubber Stamps).  I just love colouring these adorable little gnomes. Also, it's always good to make Christmas cards a little at a time throughout the year so that you are not rushing to get them all done in December. LOL! Have you started making your Christmas cards yet this year?


To create the card this week, I first used the die cut from Creative Expressions by Sue Wilson - Festive Collection - Pointsettia Mini Background - CED3049 to cut some Copic Marker X-Press It Blending Card using my Cuttlebug. I stamped the main image and then coloured it with Copic Markers. I started off doing the sky first as I didn't want any of the Reds smearing into it. (This happens sometimes if you are not careful.) Once the image was all coloured in, I used Sakura Glaze - Black and Gelly Roll Sakura #8 Pen to increase the intensity of the eye on the bird. I outlined the entire image with Pigma Micron 03 black marker to make it stand out more against the sky. Lastly, I used a mixture of Gelly Roll Sakura #8 Pen and Gelly Roll Sakura #10 Pen to create the snow and stars in the sky.

For the base of the card, I began with a standard white card base of 4.25" x 5.5". I cut another piece of white cardstock the same size and applied the red shimmer topping on it using Crafts - Sparkling Stickers - 02-3068629. I used the same die cut listed above to cut out the intricate design using my Cuttlebug and the gold paper from Hot Buy Craft Smart - Holiday Glitz Glitter Paper. I had put the gold paper through my Xyron Creative Station before I die cut it. This made it easier to just peel and stick onto the base.

For the sentiment, I die cut some spare red cardstock using Craftin Desert Diva's - Flag Banner Dies. Using my MISTI and VersaMark ink, I stamped the sentiment onto the die cut and embossed it using Ranger Super Fine Gold Embossing powder. This was heated with my Marvy Uchida - Embossing Heat Tool. The image and the sentiment were both popped up with 3M VHB - 2 sided tape to complete the card.

Card Recipe:

Stamp: Flying Gnome - TLF008 (High Hopes Rubber Stamps)

Sentiment: Sm Christmas Script - F051 (High Hopes Rubber Stamps)

Inks: Memento - Tuxedo Black, VersaMark

Paper: Copic Marker X-Press It Blending Card, Hot Buy Craft Smart - Holiday Glitz Glitter Paper 12" x 12", Crafts - Sparkling Stickers - 02-3068629

Die Cut: Creative Expressions by Sue Wilson - Festive Collection - Pointsettia Mini Background - CED3049, Craftin Desert Diva's - Flag Banner Dies (Retired)

Embossing Powder: Ranger Super Fine Gold

Tools and Miscellaneous: MISTI - Most Incredible Stamping Tool, Cuttlebug, Pigma Micron 03 black marker, Xyron Creative Station, Marvy Uchida - Embossing Heat Tool

Image coloured with Copic Markers:

Skin: E21, E11, E04, E00, E000

Beard: W5, W4, W3, W2, W1, W0, W00

Hat and Outfit: R59, R39, R37, R35, YG97, YG95, YG93, G43

Cardinal Bird: R37, R35, R24, R22, R17, R14, R08, R05, R02, R000, YR15, YR12, C3, N10, N8, Gelly Roll Sakura #8 Pen, Sakura Glaze - Black

Leaves and Holly: R59, R37, R24, YG97, YG95, YG93, YG05, G43

Shoe: E34, E33, E31

Sky: B99, B97, B95, B93, Gelly Roll Sakura #8 Pen, Gelly Roll Sakura #10 Pen

Hope you like it and have a fantastic week!

You can find lots of inspiration from the Design Team Divas at the High Hopes blog, and the High Hopes Rubber Stamps Facebook Fan page plus you can also follow us on
Instagram, Twitter and Pinterest.


Wednesday, August 12, 2020

Gnome For the Holidays

It’s Wednesday, and this week, I used Snowy Gnome - TLF024 (High Hopes Rubber Stamps) for the main image from the new August 2020 release and From Our Gnome - GLL001 (High Hopes Rubber Stamps) for the sentiment. This little gnome has gone home for the holidays to celebrate with friends and family. As you can see there are a lot of activities going on in Gnome Town. This little gnome has his snowballs ready for the next snowball fun fight! LOL! While waiting for the other team to get ready, he's decided to take a little break and enjoy nature with his little cardinal friends. Then, let the fun begin!!!


To make my card this week, I started out with a simple white card base, sized at 6" x 6". I cut some dark blue cardstock, just slightly smaller and adhered it to the card with Tombow Mutli-Liquid Glue. I just love this paper from PhotoPlay called Gnome for the Holidays Christmas. I thought it went perfectly with this new stamp. I cut it at about 5.75" x 5.75". Then I glued it to the blue paper.

I die cut multiple circles in a variety of sizes using a mixture of My Creative Time - More Stitched Circles and Lifestyle Crafts Cutting Dies - Nesting Circles using dark blue and red cardstock and also Copic Marker X-Press It Blending Card for the main image.

The image was stamped onto the Copic Marker X-Press It Blending Cardstock circle using my MISTI and Memento - Tuxedo Black. It was then coloured it in with Copic markers. For the snow, I used Recollections - Christmas Snow Paste, Martha Stewart Crafts Glitter - Crystal Fine and a spatula and let it dry overnight. Then  Stickles - Diamond was added onto the top of it. For the sky a mixture of 2 Gel pens were used and then a little bit of Stickles - Diamond to add some glitter to it. I was trying to get it to match the background paper. Once the Stickles was dry, I glued the bottom 2 layers of circles together and then the top 2 circles.  Both were done separately. The sentiment was stamped with Versa Mark and then embossed with Ranger Embossing Powder White – Extra Fine Detail and heated with Marvy Uchida Embossing Heat Tool. I fussy cut around the sentiment and glued it directly on top of some red cardstock. Then I cut around that as well.

To complete the card I popped up the bottom circles, top circles with coloured image and sentiment with the 3M VHB - 2 sided tape.

Lastly, I added some more sparkle with Stickles - Diamond by adding it to the base of the card in random places.

Card Recipe:

Stamp: Snowy Gnome - TLF024 (High Hopes Rubber Stamps)
Sentiment: From Our Gnome - GLL001 (High Hopes Rubber Stamps)
Inks: Memento - Tuxedo Black, Versamark
Paper: Copic Marker X-Press It Blending Card, PhotoPlay - Gnome for the Holidays Christmas, AC White Cardstock Dark Blue Cardstock, Red Cardstock
Die Cuts: My Creative Time - More Stitched Circles MCT-D136, Lifestyle Crafts Cutting Dies - Nesting Circles
Embossing Powder: Ranger Embossing Powder White – Extra Fine Detail
Tools: MISTI - Most Incredible Stamping Tool, Cuttlebug, 3M VHB - 2 sided tape, Stickles - Diamond, Marvy Uchida - Embossing Heat Tool

Image coloured with Copic Markers:

Skin: E21, E11, E04, E00, E000, R22, R20
Beard: W5, W4, W3, W2, W1, W0, W00
Shirt, Hat and Berries: R59, R37, R35, R24, R22, Stickles - Diamond, Gelly Roll Sakura #8 Pen
Pants, Leaves and Mitts: G99, G94, G21, YG03
Shoes: C9, C7, C5
Cardinals and Scarves: R59, R37, R35, R24, R22, C7, C5, C3, YR16, YR12
Snowballs: BV23, BV20, Stickles - Diamond
Sky: B16, B14, B12, Gelly Roll Sakura #8 Pen, Gelly Roll Sakura #10 Pen, Stickles - Diamond
Ground: Recollections - Christmas Snow Paste, Martha Stewart Crafts Glitter - Crystal Fine, Stickles - Diamond
Hope you like it and have a fantastic week!
You can find lots of inspiration from the Design Team Divas at the High Hopes blog, and the High Hopes Rubber Stamps Facebook Fan page plus you can also follow us on
Instagram, Twitter and Pinterest.


Friday, July 12, 2019

Snow Couple Merry Christmas

Welcome HH fans;

For today's post I'm sharing another "Christmas in July" card using this adorable Snow Couple Block from High Hopes Stamps.  After stamping the image on XPress It Blending Cardstock, I coloured it with Copic Markers.

 Supplies used:
  • Stamps:  Snow Couple Block (R164), Merry Christmas (GG045) from High Hopes Stamps
  • Ink:  Tsukineko Memento Tuxedo Black
  • Paper:  XPress It Blending Cardstock, DP - Winter Plaid (Lawn Fawn)
  • Copic Markers:
    • T9 - Toner Gray No. 9, T7 - Toner Gray No. 7, T6 - Toner Gray No. 6
    • B000 - Pale Celestine, B000 - Pale Porcelain Blue, B00 - Frost Blue, B01 - Mint Blue
    • G46 - Mistletoe, G0000 - Crystal Opal, G000 -Pale Green, G00 - Jade Green
    • YR07 - Cadmium Orange, YR09 - Chrome Orange
    • R29 -Lipstick Red, R27 - Cadmium Red
    • Y19 - Napoli Yellow
  • Nuvo Glitter Drops - Winter Blizzard 
  • YNS Gumdrops
As well as stopping by the High Hopes Stamps blog, you can follow us on Facebook, Instagram, Twitter and Instagram for some daily inspiration by the Design Team Divas.


Thanks for stopping by and have a fantastic day. 
 
Hugs,
 

Thursday, July 4, 2019

Woodland Santa Christmas

My family and I are literally celebrating Christmas in July on July 25th. It is cheaper for my family from out of the province to come in during the summer so a July celebration it is. 
I have some family members who love the outdoors and I think "Woodland Santa" is perfect for one of their Christmas cards. 
The High Hopes and One Crazy Stamper design teams will be bringing you Christmas in July for the month - perfect timing for me as I now need to get a ton of Christmas cards done - yikes! 


After colouring my Santa with alcohol markers and Prisma pencils I hand fussy cut him and ran a black marker around the edge to get any white I had missed. He was set aside and the patterned papers from Bo Bunny and Carta Bella were cut to fit my design. White card stock was perfect for my snow banks and snow flakes and a pine tree die gave me the perfect size for my tree detail. 
Some twine and matte dots finish off my card. 


Card Recipe 
Stamp:Woodland Santa - High Hopes Rubber Stamps
Sentiment: Merry Christmas - High Hopes Rubber Stamps
Patterned Paper: Sleigh Ride - Bo Bunny, Christmas Delivery - Carta Bella

Tuxedo Black Memento ink, Hammermill digital cover stock, Sprinkled Sugar Stickles, twine, classic square die - Spellbinders, snow banks - My Creative Time dies, fresh pine trees die - Memory Box, snow flake punch - Marvy, matte enamel dots - Gina Marie Designs. 

Spectrum Noir Markers: FS9 CR7 CR11 DR6 IG1 IG3 IG5 TN4 TN7 TN8 TB8 BT9 TB9 CG4 DG3 JG6 TB1 TB4 TB7
Copic: E00 E11 
Prismacolor Pencils: 70% 50% 30% 10% cool grey, white, black raspberry, indanthrone blue, blue slate, indigo blue kelly green

The High Hopes and One Crazy Stamper Design teams post daily inspiration on Facebook and the blog. Inspiration can also be found on Instagram and Pinterest! 
                                                               
Thanks for stopping by! Have a super fantastic day!

Friday, October 26, 2018

Merry Christmas!

Welcome back High Hopes Stamps fans;

I hope you are enjoying the new Woodsy Christmas release from High Hopes Stamps.  They are really cute and fun stamps.  For today's card, I am using the adorable Woodland Stocking. After stamping the image, I coloured it with Copic Markers.


Supplies used:
  • Stamps:  Woodland Stocking, Merry Christmas (Woodsy Christmas Release - High Hopes Stamps)
  • Ink:  Tsukineko Memento Tuxedo Black
  • Paper:  XPress It Blending Cardstock, DP - Sugar & Plum (My Mind's Eye)
  • Copic Markers:  E35 -Chamois, E33 - Sand, E31 - Brick Beige, E37 - Sepia, E0000 - Floral White, E000 - Pale Fruit Pink, R00 - Pinkish White, R20 - Blush, W00 - Warm Gray No. 00, W1 - Warm Gray No. 1, W3 - Warm Gray No. 3, W4 - Warm Gray No. 4, Y17 - Golden Yellow, YR07 - Cadmium Orange, E21 - Baby Skin Pink, E23 - Hazelnut, E25 - Caribe Cocoa, G000 - Pale Green, G00 - Jade Green, BG0000 - Snow Green, Y28 - Lionet Gold, T9 - Toner Gray No. 9, T6 - Toner Gray No. 6,G46 - Mistletoe, G43 - Pistachio, R27 - Cadmium Red, R29 Lipstick Red
  • Spellbinders Oval Dies
  • YNS Gumdrops:  Holly Jolly Sparkle
  • Poinsettia Flower
Follow the  High Hopes Stamps blog as the DT Divas will be bringing Daily Inspiration throughout the month.  You can also follow us on Facebook, Instagram and Pinterest.

Thanks for stopping by and have a fantastic day.
 
Hugs, 


Wednesday, December 25, 2013

Merry Christmas

Hello High Hopes Fans!

We wish you and your family a Very Merry Christmas! 

"And there were shepherds living out in the fields nearby, keeping watch over their flocks at night. An angel of the Lord appeared to them, and the glory of the Lord shone around them, and they were terrified. But the angel said to them, "Do not be afraid. I bring you good news that will cause great joy for all the people. 
Today in the town of David a Savior has been born to you; He is the Messiah, the Lord."

"This will be a sign to you: You will find a baby wrapped in cloths and lying in a manger."

"Suddenly a great company of the heavenly host appeared with the angel, praising God and saying, 
"Glory to God in the highest heaven, and on earth peace to those on whom his favor rests."

When the angels had left them and gone into heaven, the shepherds said to one another, 
"Let us go to Bethlehem and see this thing that has happened, which the Lord has told us about."

So they hurried off and found Mary and Joseph, and the baby, who was lying in the manger.
When they had seen him, they spread the word concerning what had been told them about this child, and all who heard it were amazed at what the shepherds said to them. 
But Mary treasured up all these things and pondered them in her heart.

The shepherds returned, glorifying and praising God for all the things in which were just as they had been told. On the eighth day, when it was time to circumcise the child, he was named Jesus, the name the angel had given Him before He was conceived."
~ Luke 2 8:21

"After Jesus was born in Bethlehem in Judea, during the time of King Herod, 
Magi from the east came to Jerusalem…
When they saw the star, they were overjoyed. 
On coming to the house, they saw the child with his mother Mary, and bowed down and worshiped Him. Then they opened their treasured and presented Him with gifts of gold, frankincense and myrrh."
~ Matthew 2:1-11


Merry Christmas from the High Hopes Rubber Stamps