Tuesday, September 6, 2011

Challenge 117: Back to School

Hello High Hopes fans!!

Before we get to the challenge and winner, we have a few things to mention.

First off, do you like the new look of the blog?
We are hoping to update the look of the blog periodically to go with the themes and seasons. The very talented Karen stamped and colored the wondering header while the fabulous Bethany (aka the right arm of High Hopes) created the background and overall design.

We have added tabs to the top of the blog to help you find what you're looking for.
You will find a tab for the current challenge, a list of tutorials, an introduction to the team and artists, and where you can find High Hopes stamps.

We also added a "Publication" Tab. Did you know that High Hopes pays you (in stamps) for any printed publication you have using a High Hopes image?! If you have been published in a print magazine, make sure to let us know!!

Also, the High Hopes webstore will be hosting a Monthly Blog Special.
Specific stamps or line of stamps will be on sale each month during the first week of the month. These specials are only available through the High Hopes webstore - not through any local or Diva retail store.
These will be on sale through tomorrow.

We hope the new layout will make it easier to find everything you need.

Oh, and we are now on FACEBOOK!! Make sure to come join our Facebook page!

Lastly, it's time to say goodbye to our most recent Guest Divas and introduce you to our newest Guests. It was such a pleasure to have Niki E and Lynne on the team. They will be greatly missed! But we are so happy to give a warm welcome to Heidi and Sarah.

Next week we will start a new program called "Meet the Divas". Once a month we will showcase two of our Designers. We will begin this program with our newest guests. So please make sure to come back next week to learn all about the newest members of the team.

Ok...it was wonderful to see all of your Autumn Color themed cards last challenge! Unfortunately, there is only 1 winner...
Congratulations, Mueppi!
Please email me at stampandcreate@bellsouth.net with your mailing address and choice of 3 High Hopes Stamps to claim your prize.
Here is her cute card using Guard Duty Rudy...
It's time for a new challenge!
This challenge is being hosted by Jeanne and her challenge is:
Back to School

You can make a card for a teacher, create a card for a student returning to school, or make someone for your little student: back back/lunch box tag, bookmark, notebook, etc...

One random winner will receive 3 High Hopes stamps of your choice.

Just remember that you MUST use a High Hopes stamp to be entered into the challenge.

For your inspiration, here are the awesome Design Diva samples...


Heidi (new Guest Diva)


Sarah (new Guest Diva)


Now it's your turn!!


Thursday, September 1, 2011

New Monthly Specials at the High Hopes Store

Hello High Hopes Fans!!

As many of you remember we used to have a Special of the month stamp set that we offered through our website a year or two back. That sale was very popular, and many of our customers have written and asked that we bring it back. Who doesn't love a sale? We know we do, and so in the spirit of stretching our stamping dollar, we will be posting to this page a new sale starting at the first of every month, to run a week.


Our first sale is a blast from the past sale, featuring the girly swirly fabulous art of Melissa Jenkins aka MelJen's Designs. Though her stint as a High Hopes artist was short lived, we still love her sweet and quirky style, and hope you do too!

For the first week of this month,
You can find the 22 images and 2 saying stamps included in the sale by going to the High Hopes website and clicking on the "online catalog" link. Once there put the keyword "Meljens" in the search box and then, you're off to shop!

Your order total will be discounted before you are billed with a final invoice that reflects your savings.

Be sure to check back the first of every month to see the new monthly special, a great way stretch your stamping dollars!

Here are some samples by the Divas using the stamps on sale...

Tuesday, August 30, 2011

Tutorial: Cupcake Topper by Lacey

Hello High Hopes fans!!

If you are looking for the current challenge, click here.

It's Tutorial Tuesday Time!!
This week, I (Lacey) get to share a tutorial with you.

While working on the Autumn Color Challenge, I decided I wanted to showcase some of the adorable Halloween stamps that Laurie Furnell illustrated last year.
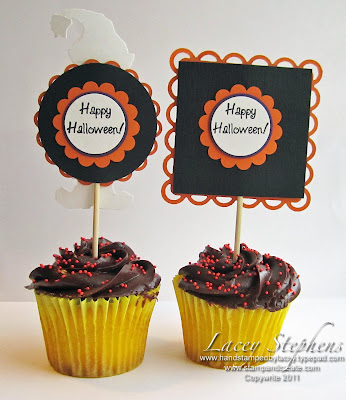
I thought they would make a fun Halloween Themed Cupcake Toppers...
These are super easy to make.
Plus, you can probably re-use the images after the cupcakes are eaten!

For my samples, I used Standing Witchy Poo and Witchy Poo and Kitty Frame. But you can find all of the Witchy Poo Stamps here and all of the Halloween designs here...lots to choose from!

Supplies:
~ Stamped, colored, and cut out images.
~ Punched and die cut shapes (to back the image. (You will need 2 of each background shape for each topper.
~ Skewer or popsicle stick (I cut some wood skewers down to 6")
~ Dimensional foam
~ Adhesive

I apparently missed the photo of the first step! Sorry!
1. Attach your colored image to a die cut shape. For my design, I used some nestability shapes. I chose a medium size circle so that it wasn't too large or heavy for the cupcake to hold up.
2. Apply Foam dimensionals to the back of the diecut shape. I placed one at the top to ensure that it will stop the image from sliding down on the stick. I also applied some adhesive to make sure the image didn't stays put and doesn't fall off the stick.

3. Attach the stick to the adhesive making sure it is centered behind the design.

4. Use the other diecut shape to sandwich around the stick. This will hide the stick and allow you to decorate the back of the design as well.

5. To decorate the back of the design, I used Happy Halloween Sentiment Top/Bottom along with a few punched layers. But you can decorate the back any way you want.

6. Repeat the process for all of your toppers.

7. Place the toppers into the cupcakes and serve!!

Of course, these toppers work for any type of cupcake party
(Birthday, Graduation, Holidays, etc...).
Whatever the party, I'm sure High Hopes has the stamps for the theme you are looking for!!
Go check them out at www.highhopesstamps.com!

Tuesday, August 23, 2011

Challenge 116: Autumn Colors

Hello High Hopes fans!!

It looks like the past few weeks have been a favorite with you all!! You seemed to enjoy the "Anything Goes" challenge as well as Anna's Faux Stitching Tutorial!!
Thank you all for your lovely comments and participation.

The random winner of the Anything Goes Challenge is:
Congratulations, Dorthy S.
Please contact me at stampandcreate@bellsouth.net with your mailing address and choice of 3 free stamps!
Here is Dorthy's lovely card using Ice Cream For Two...

We are hosted this week by the talented and sweet Niki!!
Her challenge is:
Autumn Colors
(any combination of orange, black, purple, brown, red)

One random participant will win 3 FREE High Hopes stamps!!
Just remember, you MUST use a High Hopes image on your card to participate.
If you do not use a High Hopes image, your link will be removed.

If you are in need of some High Hopes stamps, why not check out the Diva's Stores:
Lacey Stephens - Stamp and Create based out of the US
Nikki Fairbairn - Bunny Zoe's Crafts based out of the UK/Europe
Amy Wegener - Stampin' Stuff based out of Australia

Now here are the fantastic Design Diva samples for your inspiration...

Kristine
Karen
Alex.
Lynne
Jeanne
Lacey
Tanya
Andrea
Sirpa

Anna (using more of that Faux Stitching technique from her tutorial).

Tuesday, August 16, 2011

Tutorial - Faux Stitching by Anna

It's Tutorial Tuesday Time!!

If you are looking for the current challenge, click here.

We are back this week with a Faux Stitching Tutorial by the fabulous Anna Wight!!

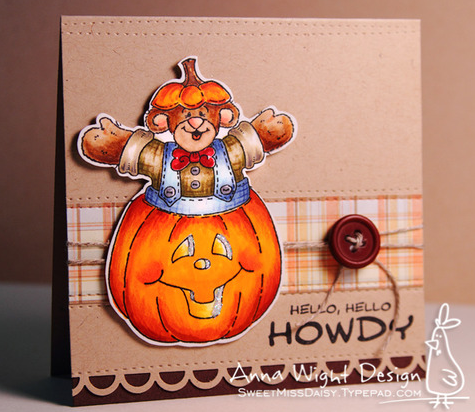
One of my absolute favorite things to add to my cards and other paper craft projects is faux stitching. You might be familiar with the faux stitching technique that uses a paper piercer (or thumbtack) and marker to create faux sewing machine holes and faux thread. That is a great technique, but I do something a little different!
Let me introduce you to the tracing wheel! When I add faux stitches to my projects, I prefer to use the tracing wheel which is commonly used by seamstresses. You can find tracing wheels in most sewing departments at fabric and craft stores. They’re inexpensive, and are so very handy! I’ve put together several projects to demonstrate just a few ways you can use this wonderful little tool!
For the sailor card shown above, I used the tracing wheel to create a subtle grid on the base of the card. Most of the time I just eyeball the lines on my projects, but you can use a clear ruler to easily guide you if you prefer to have evenly spaced, straight lines. I recommend using a self-healing mat under your project. The mat will provide just enough “give”, while not allowing the tracing wheel to cut into your paper (or your table top). If you don’t have a self-healing mat, a magazine you’re willing to roughen up works well too.
When you complete your grid, you’ve got a more interesting card base without the added weight (and cost) of patterned paper.
You’re not limited to creating faux stitching on plain card stock! Here I’ve added a grid to polka dot patterned paper for added visual interest. The added texture is nice as well.
You can also use the tracing wheel to quickly add graphic qualities or other visual elements to your projects.
I used the tracing wheel on this card to give motion to the spaceship. A few lines is all it takes to bring a little life to a very simple card. And because I wanted to use solid black card stock behind the spaceship, using the tracing wheel to create blasts worked really well!
You can use the tracing wheel to create straight lines around the edges of your cards, and you can create curved lines to accent other areas, as I’ve done on this card to detail the tops of the hills.
I also used the tracing wheel to create flower stems and center lines on the leaves, and also to parts of the sentiment banner to pull all of the card elements together.
You can also use the tracing wheel to simply add visual interest to the edges of your projects as well. I like using it around the edges of matted layers. It quickly adds another element to the project that doesn’t add extra weight or bulk. It’s a technique that’s ideal for cards being mailed!
Tracing wheels have been around for a long time. Keep a look out at antique shops, ebay, garage sales, etc for unique, vintage wheels. Here are two wheels from my collection that are fun to use. A double wheel, and a flat edged wheel. Each wheel produces a unique line, so be sure to find one that you really enjoy using.
How do I feel about tracing wheels? I think they’re out of this WORLD! I hope you consider adding one (or more) of these fun tools to your paper crafting toolbox.