
Hello High Hopes Fans!!
We are back this week with another Tutorial Tuesday! :-)
The lovely Andrea has created a tutorial to share with us today.
Before we get to that, if you are looking for our current challenge, click here.
And now here's Andrea...
Thanks for the warm welcome Lacey! Even though most of us are chocolated out for a least a day or two after our Easter celebrations I wanted to share a sweet treat tutorial that I learned years ago from splitcoaststampers which is also a great place to see lots of High Hopes stamped creations!

For this craft you will need the following items:
scissors
strong tape
stamps
6"x7" cardstock
2.5"x6.5" cardstock for bellyband (optional)
inks
colouring mediums
embellishments
scoring tool
paper cutter
slot punch
ribbon (measure by wrapping it lengthwise around your chocolate bar then I added a few more inches to be able to tie a nice knot

Score your cardstock at on 6" side at 2 3/4" and at 5.5"
and score your bellyband at the same dimensions.

I used a border punch to decorate my bellyband.

Stamp front of chocolate bar cover.


Add tape to outside scored 1/2' strip of paper and then turn it over to apply tape to the outside 2 3/4" panel. Remove backing to adhesive and fold wrapper lengthwise and adhere to make pouch. The paper will be bowed slightly when you line up the seams and then pinch the bottom where the other adhesive is to seal the bottom of pouch.
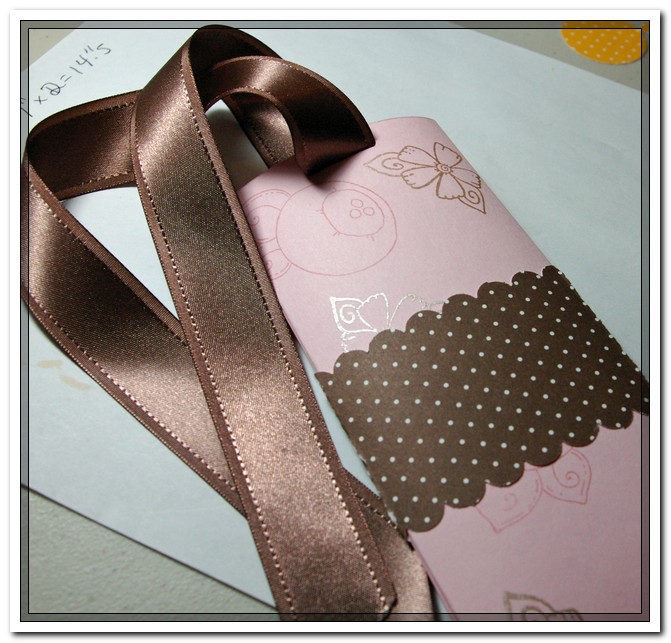
Punch slot in front only of wrapper to allow the ribbon to be threaded through. I punched my slot 2x to allow for the width of my wide ribbon. Slide bellyband onto pouch if you are using one. Thread the ribbon through and make sure it is even on both sides. Take your chocolate bar and place it in between the ribbon strips and push your chocolate bar into the pouch making sure your ribbon is still even on both sides as it moves down the pouch. Once the ribbon is inside tie it into a knot or strong bow.

Finish decorating bellyband as desired. I coloured up Blowin' Buddy Bear and popped it up on the bellyband.


Your crafty treat is now complete!! This would make great party favours, teachers gifts and how about using one of our party invitation stamps and stamping it to the back of the wrapper and use this as a unique party invitation! The possibilities are endless!
Now I am off to enjoy a chocolately treat with my tea. I hope you enjoy making this treat wrapper too!
1 comment:
Awww! That is just the cutest thing ever :) I have to try this too. Thanks for sharing.
Post a Comment