Hello High Hopes Fans!
Click here for our
current challenge.
It's Tutorial Tuesday Time!!
Michelle has created this fun tutorial...
GateFold Card - Showing off a Scene
Howdy Fellow High Hope Fans -
Today I have been asked to do a tutorial for a Gate Fold Card -
Now my Gate Fold Card is a bit of a show off - Do you have background stamps
that you want to use more, this is a great way to use them and your favorite
images in one card.
An easy card - with a little different view to it.
First you color your images so you know how to size your gate
fold. One background to place on the inside base. Then two smaller images to
fit onto your “folds”.
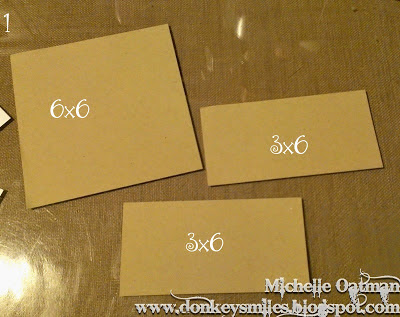
Then on to the card! You need to create the base -
Cut pieces -
(1) 6x6
(2) 3x6
or (1) 6x12
Line the pieces so that they create an upside down T-shape. Use
your bone folder and create folds Vertically at the edge or basically 3 inches
left and right. Attach on one side then fold over the base.
You can actually make the size of the “top” folds as high as you
would like. To show off the size of your background stamp that will be used on
the base. Or you can make it full size and not show off your base.
Next we create the finished base.
Cut a card stock mat 1/4 inch smaller than the base - for me -
5.75 x 5.75 inches
Then your pattern paper - 5.5 x 5.x5 inches.
And then your “art” background stamp. Make sure when you stamp
this image and color it that you stamp at the top of the paper and have enough
space to cut this as a whole piece. The white lower part will be behind your
folds and where your message will be.
I sewed my together then used adhesive to attach to the inside
base.
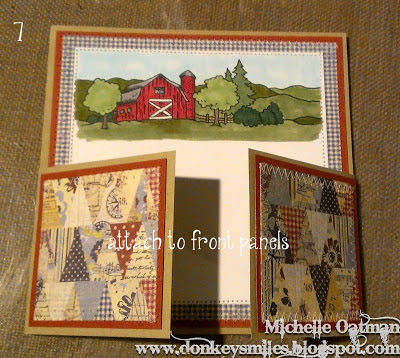
Now the folds
Pretty much smaller versions of what you just did - for my folds
the mats measure -
Card stock mat - 2.75 x 2.75 inches
Pattern Paper - 2.5 x 2.5 inches.
Attach to the fronts of the folds.
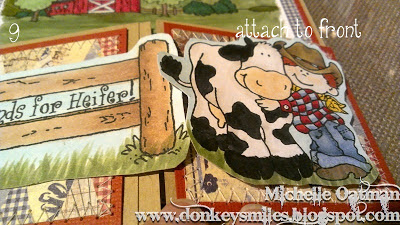
Then loosely cut out your two images. The image on the right side
needs to be placed first. I use pop foam to raise it just a bit. Now I hope
this makes sense. You only want the foam to be on 2/3rds of the image - the right outside edge of the image.
This leaves an empty left side to tuck the image on the left
fold. Helps keep the card closed and joins the two images when flat.
When you attach the image on the left. It is placed directly on
the pattern paper. Let it hang over towards the right fold enough to be able to
“tuck” it behind your popped up image. Sound ok? It is harder to explain than
do believe me.
Done -
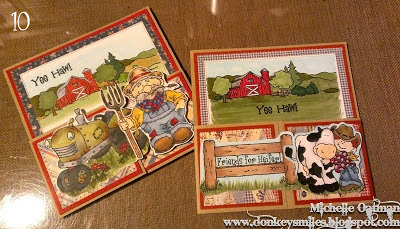
Here is my cards again - Showing different fold images.
I added Sentiment stamps and if you are really observant you will
see that I colored down further on my background stamp to meet the top of my
folds. Just looks better to me to not have any empty white showing and look
more like a complete scene.
It is really pretty easy - and sometimes fun to do something just
a bit different! And I love that it gives a chance to use more images in one
card!
Hope you enjoy my version of a Gate-Fold card!
~ Michelle


