It’s Wednesday, and this week, I made a snow lady Christmas card using High Hopes Rubber Stamps Snow Kisses - TT059 for the main image and Holly Jolly - K048 for the sentiment. I've always loved snow people and birds and this stamp combo makes me smile because it has both.

To make my card this week, I began with a card base of AC Cardstock - White, cut and scored to be 6" x 6". I cut 2 strips of Doodlebug Design Inc. - Winter Wonderland coloured snowflake pattern to the size of 6" x .75". 2 strips of Doodlebug Design Inc. - Spring Solid Assortment paper to the size of 6" x .25" and 1 strip of Forever In Time - Textura Sky cut to the size of 6" x 4". With Tim Holtz Distress Ink - Evergreen Bough and a blending brush, I inked around all of the edges of the larger pieces. I ran all of the smaller pieces through my Xyron Create a Sticker. The pieces were then attached to the base card from top to bottom. I used liquid glue to attach the larger piece. I trimmed around the 3 sides of the card with a paper trimmer to make it all even.
For the frame around the image, using my Couture Creations - Go Power and Emboss die cutting machine, I die cut the entire frame with Doodlebug Design Inc. - Winter Wonderland paper and Penny Black - Graceful Stackers dies. 2 dies were pieced together for the pink frame using my cutting device and Forever In Time - Textura Blush cardstock. Lastly, I stamped the image with Memento - Summer Sky ink onto Lawn Fawn - Sparkle Cardstock in "Pixie Dust" using my MISTI. I took this piece and ran it through my Couture Creations - Go Power and Emboss die cutting machine again so that it would fit snug into the frame. I cut off the remainder following the stamped snow along the top and inked it with the Memento - Summer Sky ink. Using liquid glue, I applied the pink frame over top of the snowflake die cut while carefully matching up the edges. Liquid glue was applied to the lower back of the snow piece and it was attached to the snowflake background inside the frame.
The image was stamped onto Copic Marker X-Press It Blending Card using my MISTI and Memento - Tuxedo Black ink. After colouring the images, I fussy cut around all of them and then with a black marker, inked around all of the edges. I popped up the snowlady using U-Line double-sided tape and attached her to the card under the snow. The little bird was also popped up using U-Line double-sided tape and some liquid glue. Using Copic B41, I added in some shadows in the snow and Stickles - Hibiscus was applied to the scarf and pompom to give them some extra sparkle.
The sentiment was stamped onto Doodlebug Design Inc. - Spring Solid Assortment using my MISTI and Versamark ink. Ranger Embossing Powder White – Extra Fine Detail was applied and then heat embossed using a Marvy Uchida - Embossing Heat Tool. Using my Cuttlebug and My Creative Time - More Stitched Circles, I die cut the sentiment. The edges were inked around using a finger dauber and Tim Holtz Distress Ink - Evergreen Bough. The snowflake was cut using my Cuttlebug, Lawn Fawn - Sparkle Cardstock in "Pixie Dust" cardstock and die from Recollections - Christmas Snowflakes Clear Stamp & Die set. I popped up both the sentiment and snowflake using U-Line double-sided tape onto the card. Lastly, I added 3 Doodlebug Designs Inc. - Sprinkles onto the frame to finish it off.
Card Recipe:
Stamps: Snow Kisses - TT059 (High Hopes Rubber Stamps)
Sentiment: Holly Jolly - K048 (High Hopes Rubber Stamps)
Inks: Memento - Tuxedo Black, Tim Holtz Distress Ink - Evergreen Bough, Versamark, Memento - Summer Sky
Paper: Copic Marker X-Press It Blending Card, AC Cardstock - White, Doodlebug Design Inc. - Winter Wonderland (6" x 6"), Doodlebug Design Inc. - Spring Solid Assortment (12" x 12"), Lawn Fawn - Sparkle Cardstock in "Pixie Dust" (8.5" x 11"), Forever In Time - Textura Sky, Forever In Time - Textura Blush
Die Cuts: Penny Black - Graceful Stackers (51-658), My Creative Time - More Stitched Circles MCT-D136, Recollections - Christmas Snowflakes Clear Stamp & Die 529291
Embossing Powder: Ranger Embossing Powder White – Extra Fine Detail
Tools: MISTI - Most Incredible Stamping Tool, U-Line double-sided tape, Stickles - Hibiscus, Cuttlebug, Blending Brush, Doodlebug Designs Inc. - Sprinkles, Xyron Create a Sticker, Couture Creations - Go Power and Emboss, Marvy Uchida - Embossing Heat Tool
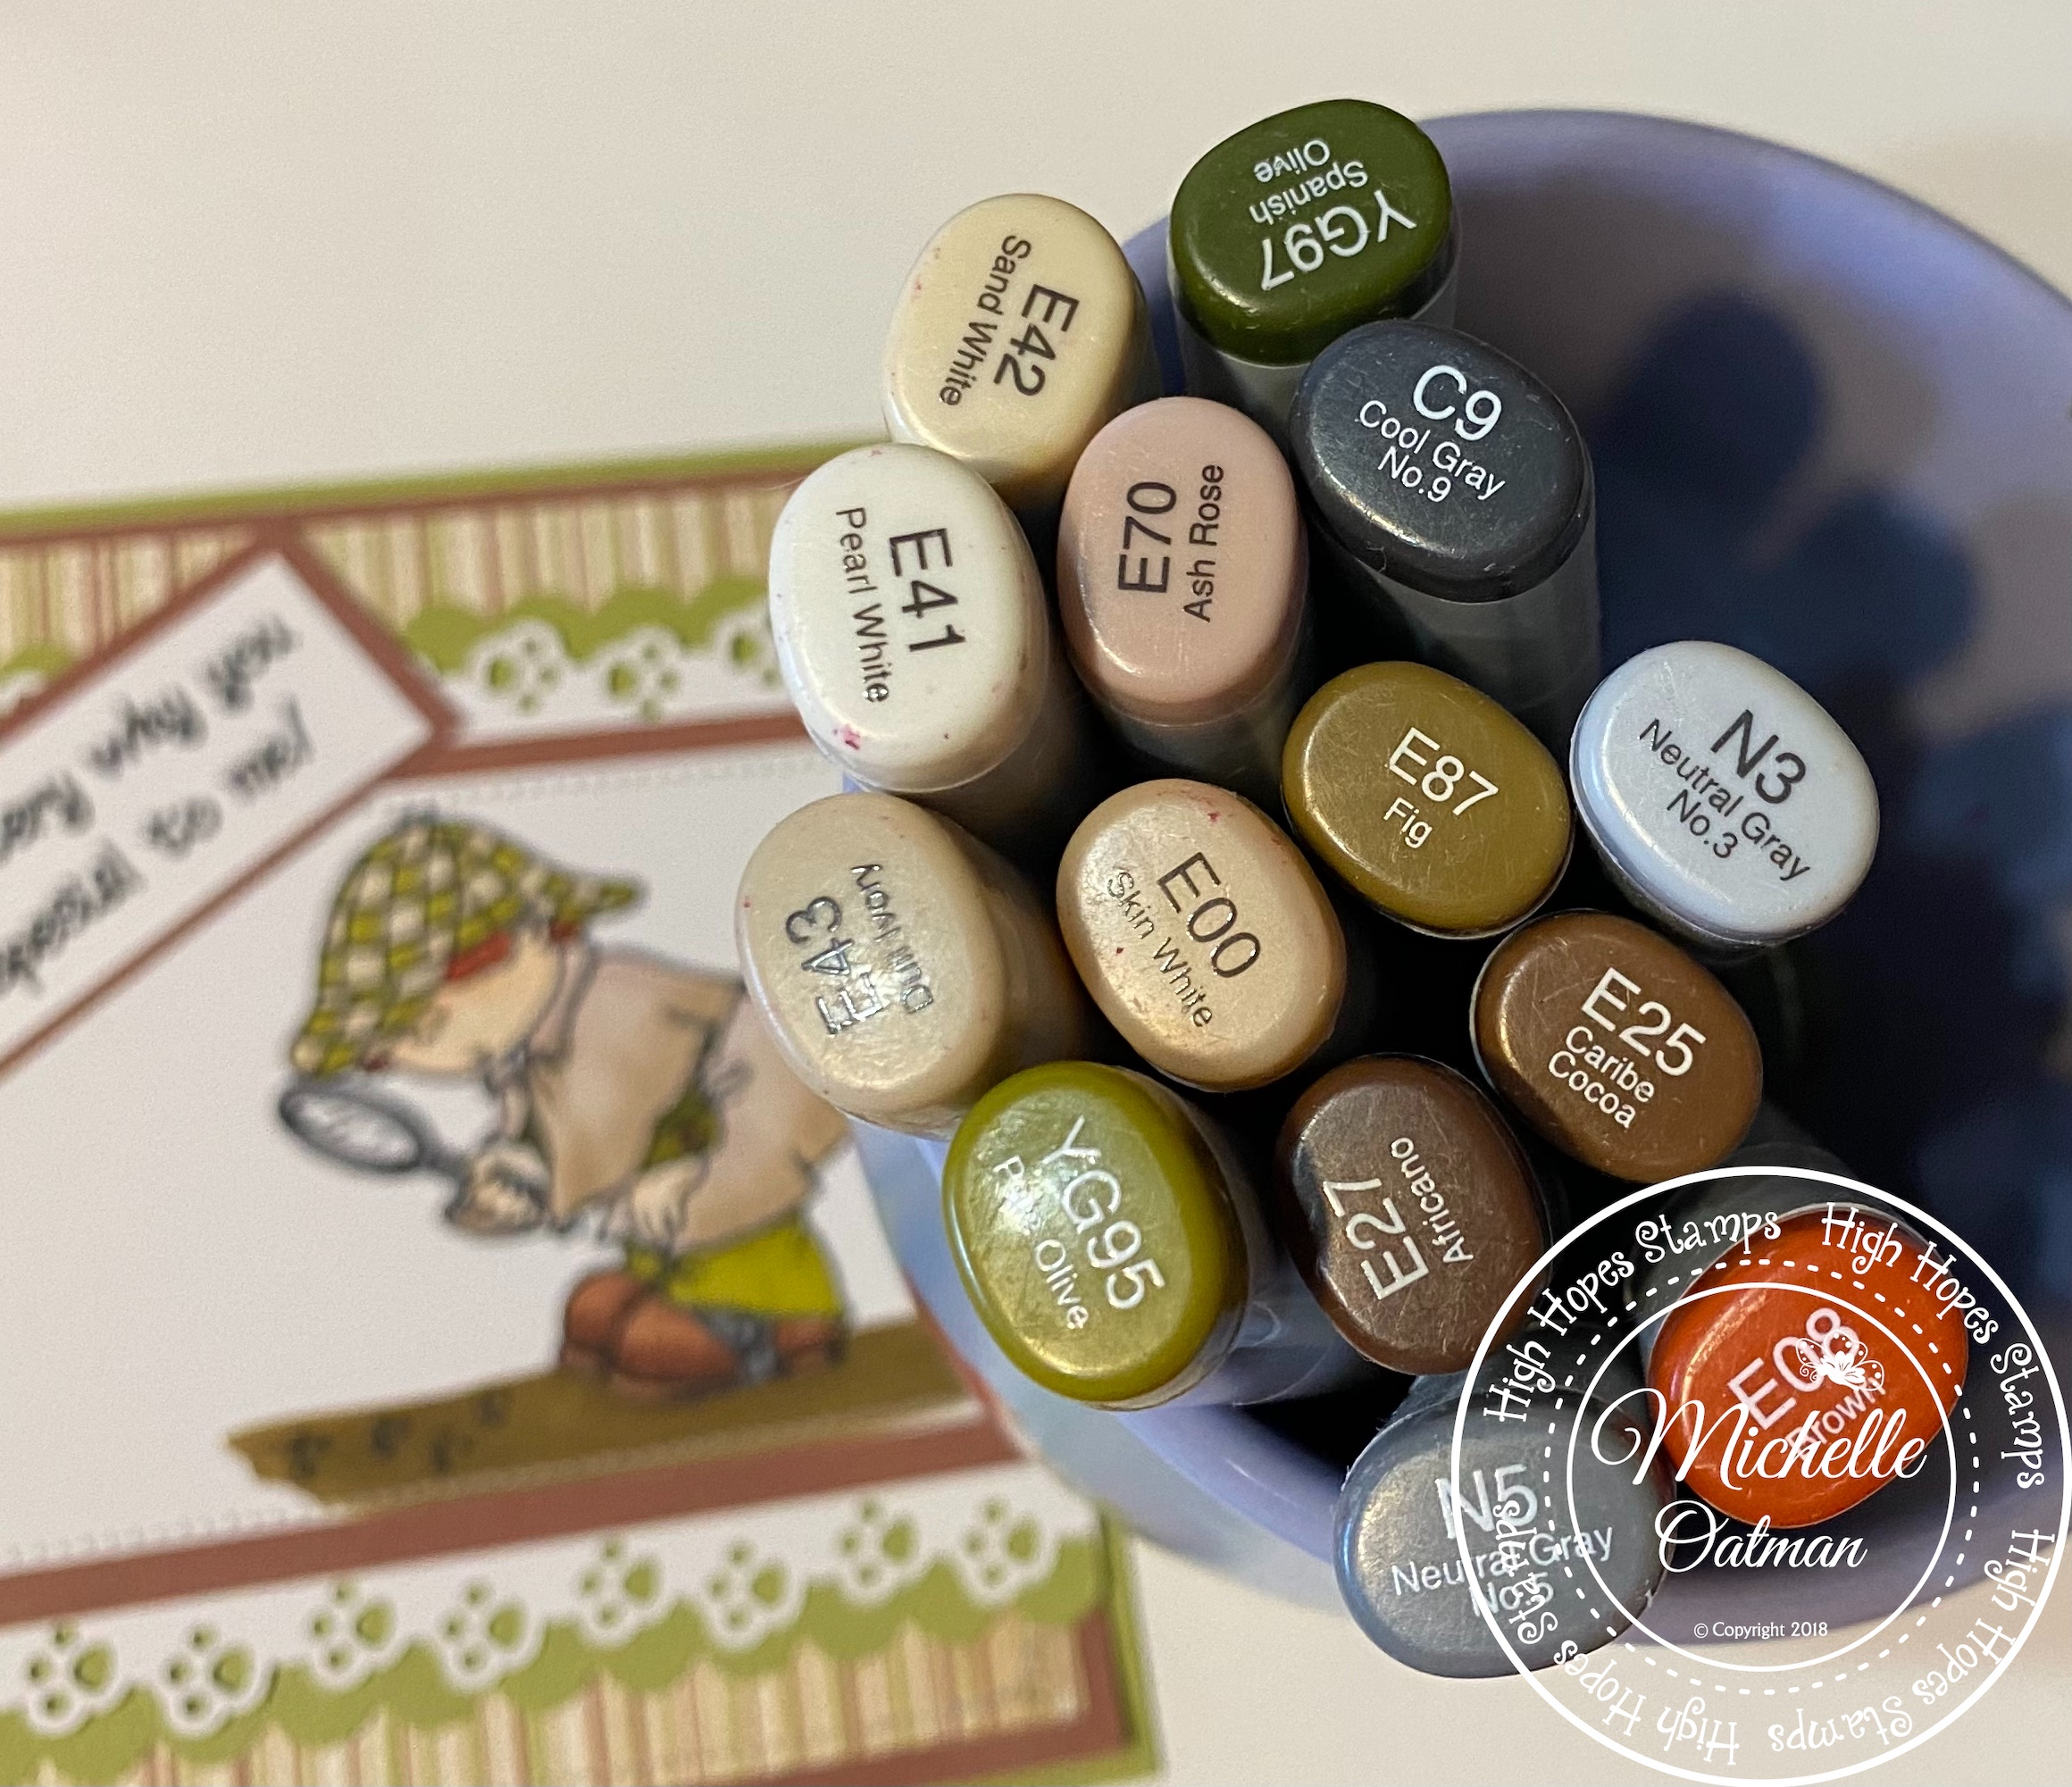
Image coloured with Copic Markers:
Snow Lady: BV20, C00, Colorless Blender, YR18, YR12, YR07, YR04, R29, R27, R24, Eyes (Sakura Glaze - Black), Stickles - Hibiscus
Mitt's, Coat and Hat: BG72, BG57, BG32, BG13, BG11
Scarf and Trim: RV69, RV09, RV06, RV04, RV02
Birds and Earmuffs: B97, B95, B93, B91, R46, R14, R08, YR12, YR07, YR04, R85, R83, R81, RV55, RV17, RV14, BV02, BV01, BV00
Hope you like it and have a fantastic week!
You can find lots of inspiration from the Design Team Divas at the High Hopes blog, and the High Hopes Rubber Stamps Facebook Fan page plus you can also follow us on
Instagram, Twitter and Pinterest.


.png)